Enrollment now open!

Enrollment is
NOW OPEN

for

the Fall 2019

—  Felted Wool Blanket Master Class  —


Class begins October 1


—  Consider joining us!  —

Looking for more information about the course?

    • Read all about the course details here.
    • See what past students have said about the course here.
    • Watch a video with 8 reasons you just might want to make a wool blanket here.
    • Read about one method of finding inspiration for a wool blanket here.
    • Have any questions I can answer for you? Write me here!

■ ■ ■

IMPORTANT: After this Fall 2019 session of the class, I don’t plan to open it again until fall of 2020. Even if you intend to wait until after the new year to start a blanket, you might consider signing up for this session. You can access it—and the group’s private Facebook page—ANYTIME!

“What was the most valuable part of class?”

Tap here for class details.

IMPORTANT: After this Fall 2019 session of the class, I don’t plan to open it again until fall of 2020. Even if you intend to wait until after the new year to start a blanket, you might consider signing up for this session. You can access it—and the group’s private Facebook page—ANYTIME!

■ ■ ■ ■ ■

Each time I’ve taught how to make blankets, I’ve solicited feedback so I can be sure I’m addressing all the right things. And each time I’ve taken an online class, I carefully read what previous students say about that course. It’s really helpful in deciding if a course is a good fit.

So here for you are the thoughtful answers of past students to one particular post-class question:

“What was the most valuable part of this class?”

“There were SO many valuable parts—but I especially appreciated the discussion on design/color arrangement, the resources (books), using a color wheel, and making the binding. The advice on how to sew it on was so helpful!” —Linda

“The tips for cutting the sweaters!” —Annie

“The comfortable and non-dogmatic way you teach. You inspire confidence right away, you teach step-by-step so that it is never overwhelming. Your responses to any questions are prompt and most helpful.” —Anonymous*

*Some responses are “Anonymous” because I experimented with using an anonymous survey for one class session.

“The videos were invaluable—watching you actually do what you were explaining made all the difference. For example, I had never put a binding on an item but easily understood with the video.” —Timary

“Your lessons were very well-organized and they were digestible bits of lessons. I often had only 30 or so minutes of time to spare, and your short lessons allowed me to feel like I was able to stay caught up! I loved that you had written notes in addition to the videos.” —Pat

“Learning how to handle the wool. It is vastly different from cotton. Wiggles and moves all over the place. Seeing the techniques you used to cut and sew it were helpful.” —Patti

“I loved that the course was broken down into manageable parts. It was great to get feedback from you and others in the group. By encouraging us to introduce ourselves, it really felt like we were there to support each other. Also, you know a lot and could provide references or additional resources to learn more if we wanted to.” —Sara

“I loved everything about the class: listening to you (you have such a soothing voice), seeing your creations step-by-step, seeing your recap segments, seeing others’ creations. It was a great investment.” —Anonymous

“I loved the section that covered making the binding. I’ve done some blanket making on my own and have never tried this method. I also loved the challenge of doing some math to figure this out.” —Stephanie

“I loved the ‘real time’ aspect of your videos and seeing you demonstrate all the techniques start to finish. I especially appreciated (and benefited from) seeing you struggle to find a layout for your blanket that you liked. It was helpful to see you arrange and then rearrange your blocks and in that demonstration, we were able to then understand that it is a process with no right/wrong answer. I also loved the practical feedback you provided people on their layouts.” —Pat

“The videos were the most valuable part of the class! I like to learn by watching, and they were very easy to follow. Also, the written instructions were helpful to go back to, so I didn’t have to rewatch the videos.” —Sally

“The wonderful instruction on every detail of the process.” —Anonymous

Later this week I’ll post answers to the question, “What was one thing in the class that surprised you?” And I’m excited to bring you a special guest interview with a past class participant who is about to begin her third blanket!

Do YOU have any questions you’d like to ask me about the course? Please contact me HERE. I’ll be glad to answer!

A Helpful Method to Begin a Blanket

Are you pondering whether to make a felted wool blanket? If you’ve been planning one for awhile, you may already have some sweaters collected. If you’ve just begun thinking about it recently, you may have gathered only a couple—or none at all.

Well, it’s nearly fall (for half the planet), which means sweaters are in resale shops around here and it’s a good time to go after them!

There are typically two things I think about when I look for sweaters. First, I consider fiber content and features. If you’d like to learn more about those, you can sign up here for my video, “Find and Choose Good Sweaters” (which will also add you to The Green Sheep email newsletter list).

Second, I need to think about combining colors. That’s what I’m going to talk about today.

Here’s the very, very best question to ask when combining colors:
When you put two sweaters next to each other, DO THEY SING? Do they ask to be playmates? Do you hate to separate them?

If you answer YES, then keep those babies together. They are
going to be beautiful in a blanket!

That is an excellent place to begin. But of course, pulling in even more sweaters and their colors can become a bit complicated.

I’m not going to call you crazy if you buy up all the wonderful sweaters you can find (umm, yes, I’ve done that, more than once). But that approach can leave you overwhelmed with possibilities. Another way would be to have a few ideas in mind as you start browsing.

But where do you get ideas?

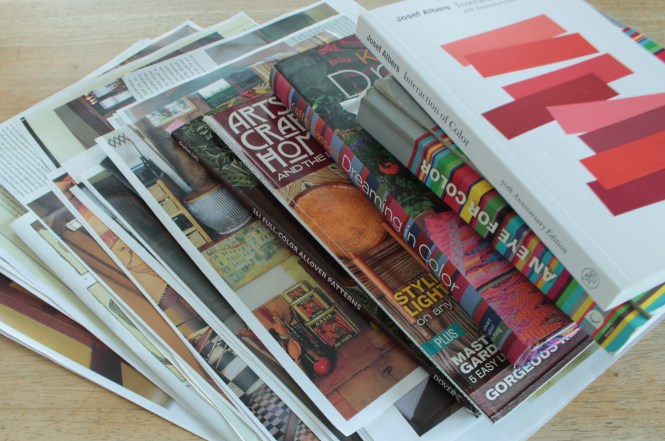
For me, it’s often from photos, lot and lots of photos. When I first began making blankets, I feasted on photos in order to learn what I liked about various color combinations.

Way back at my start in The Green Sheep, I headed to the library for books of beautiful interiors. I made color photocopies of mesmerizing color combinations for my own reference. (Unfortunately, I can no longer find the titles of these wonderful books.) The blues and gray-greens in the right-hand photo with that golden wood harp—Wow! That one is still a favorite, and I’ve not thoroughly capitalized on it (although there are echos of it in “Quiet at Last,” below).

I’ve long loved Arts & Crafts-era objects, design and colors, so I browsed those books as well, and even subscribed to a magazine for a couple of years. William Morris’ Bird upholstery on the ebony chair, below, inspired “The 70s Throw” in the pic just underneath it.

This little book, An Eye for Color, has sparked ideas for many projects. (I’ve actually mentioned it several times, initially here. It has played a part in several blankets, including “A Sunbeam to Warm You” and “Summer Nostalgia.”

Author Olga Gutierrez de la Roza organizes this book by color, populating it with photos of a wide variety of art pieces. She then pulls out several of the colors present in each and prints an accompanying “palette.”

The colors in this painting of the woman are deeper but similar to the colors in a fave photo I already showed you above. I’ll repeat it here (the one on the left). Right?? Over time I began to see patterns in what I’m drawn to.

This photo idea thing can work two directions: Method 1 starts with the PHOTOS and Method 2 starts with the SWEATERS. In Method 1, I use photos to help me dream up a complementary set of colors, and then  I look for sweaters to be part of that plan. In Method 2, I look at what sweaters I have on hand, and then use photos to get an idea of interesting combinations.

In a riff on Method 2, I also refer to photos to help me solve questions of how to mix several color hues and values in one blanket. (This is especially true when a client ships me a box of many sweaters, all destined for one custom-ordered blanket.) For the blanket that became “Happy Winter,” I started with sweaters in complementary color families—blues, purples, pinks, reds—but the mix of brights and pastels felt very choppy together. This pic below from Gutierrez’ book helped me understand how I needed to establish order and pattern to bring together the high-contrast colors smoothly. You can find the final “Happy Winter” below.

Happy Winter

A book of Hans Christian Andersen tales, illustrated by Lisbeth Zwerger, helped me recapture a childlike freedom to play with the many, many pastel-colored sweaters that arrived in a client’s box to be put into a little girls’ bedspread. Those sweaters eventually became “Calliope’s Castle,” below.

Josef Albers’ Interaction of Color helped me understand the power of placing particular colors next to each other. I realized after-the-fact how influential the book had been, even years after working through it, when I stood back after finishing “Blessed are the Merciful,” below.

©Joan Olson “Blessed are the Merciful” (61×75) Felted wool sweaters

There you have it. There are infinite resources out there, right? I encourage you to find what color combinations you like. Start anywhere! Capture and save online photos, search your bookshelves for beauty, sit in front of your favorite “picture book” section of the library and choose some print materials—magazines? art books? interior design books?  And always, always hold your sweaters next to each other and see which ones are begging to be partners. Have fun!

The Mouse Hole

Remember those clever mice who helped Cinderella sew her ballgown? I’m not Cinderella and I haven’t been working on a gown, but I too was recently charmed by the help of a small creature on a sewing project.

A devoted client asked if I could repair her grandson’s blanket. “He’s like a little mouse!” she said. “He nibbles all around the edges!” Indeed, I found and darned many tiny holes in his Mickey Mouse blanket. (This mouse theme, so apt.)

Here’s the original blanket, below, back when I just finished it nearly 4 years ago. You can find the story of it here.

But there weren’t only tiny holes; there was one large hole chewed/torn in the stretchy black striped border. For that hole I needed a better solution than darning.

Here’s the gap, about 1″ in diameter. I took this photo just after I made a simple, loose backstitch around the hole’s circumference to stabilize the edges and keep it from stretching larger.

The day she dropped off the blanket, my client threw out some great ideas for covering this bigger hole: “How about a band-aid appliqué?” I love it! And yet I could not get the picture of a nibbling mouse out of my head. I thought it would be sweet to give Mickey some company. So I sketched out a few critters and settled on one.

I traced the drawing onto fusible web, then realized the sewn-in label right next to the hole in the blanket would not allow for the “high alert” tail. I drew a more relaxed version that would fit.

For scale, here’s the little mouse, looking at the hole he’s about to assist in the repair of. He’ll be flipped the other direction for the actual application.

I chose a tan fabric for him that blends with the already-existing colors in the blanket but doesn’t match them completely, in order to honor his own, Johnny-come-lately, disposition. After top-stiching detail onto him, I ironed him into place and pinned a black backing fabric to the patching area so the hole would be covered from both sides.

Here he is after the zig-zagged application:

And here’s the reverse side:

I trimmed off the extra black fabric from the back for this final shape. The silhouette blends in nicely and will keep that hole completely covered.

It’s entirely possible this may not be the laaast repair of this blanket.

Maybe I need to be ready with some extra appliqués…
a band-aid,
a chunk of cheese,
a mouse trap?

(Just kidding.)

Anyway, here are the new buddies, ready to get back to Theo’s house where they’ll be well-loved some more.

Class Begins!

Hello, Folks! Just a quick post to say the Felted Wool Blanket Master Class starts tomorrow! You can step right in and begin forthwith to create your own felted wool blanket. This is a great time of year to work on a blanket, as life is a little quieter than usual…plus, um, it’s cold.

Want to learn more? Go here to read all the info about the class. You can sign up there too.

(Please note: Enrollment for the class will stay open an extra week (through January 26) as I inadvertently caused a frustrating sign-up glitch when I first launched enrollment. Ugh! If you have any trouble signing up, contact me directly and I’ll help get you squared away.)

Winter 2019 Blanket-Making Class is Open for Enrollment!

©Joan Olson “Blessed are the Merciful” (61×75) Felted wool sweaters

Happy New Year!

It’s a day for kicking back, enjoying something out of the ordinary, maybe dreaming about 2019. I won’t interrupt all that.

But I do want to announce that this winter’s Felted Wool Blanket Master Class is NOW OPEN for enrollment. Woo hoo! If you’ve ever wanted to make a wool blanket of your own, this might be the time. Go here to find all the details. If you’ve got any questions, ask them right here at the bottom of this post.

Class starts January 12. Work can be done along the course timeline or at your very own pace—as you will have access to curriculum indefinitely. There’s also a private Facebook group for all sorts of helpful interaction, which you’ll be invited to join as soon as you enroll. Enrollment will remain open through 1/12/19. Sign up here.

Maybe I’ll see you in class soon!